Flask Templates
Previous:
Flask intro: A very simple Flask app
Flask, part 2: Values in routes; using an API
Code for this chapter is here.
In the previous Flask chapters, we wrote some HTML directly into the Flask app script. This is very awkward. Naturally, Flask provides a better way to store the HTML (and CSS) you will want your Flask functions to generate.
Folder structure for a Flask app
A proper Flask app is going to use multiple files — some of which will be template files. The organization of these files has to follow rules so the app will work. Here is a diagram of the typical structure:
my-flask-app
   ├── static/
   │   └── css/
   │       └── main.css
   ├── templates/
   │   ├── index.html
   │   └── student.html
   ├── data.py
   └── students.py
Everything the app needs is in one folder, here named my-flask-app.
That folder contains two folders, specifically named static and templates.
The static folder contains assets used by the templates, including CSS files, JavaScript files, and images. In the example, we have only one asset file, main.css. Note that it’s inside a css folder that’s inside the static folder.
The templates folder contains only templates. These have an
.htmlextension. As we will see, they contain more than just regular HTML.
In addition to the static and templates folders, this app also contains
.pyfiles. Note that these must be outside the two folders named static and templates.
Attention
The templates will not work if this folder structure is not exactly as described above. Your app folder can be named anything (not only my-flask-app), but the static and templates folders must be named and organized as shown above. The static folder can contain multiple folders and files. The names of files are up to you.
Get started with templates
Let’s first imagine a situation where we are going to need a lot of pages that all have the same layout.
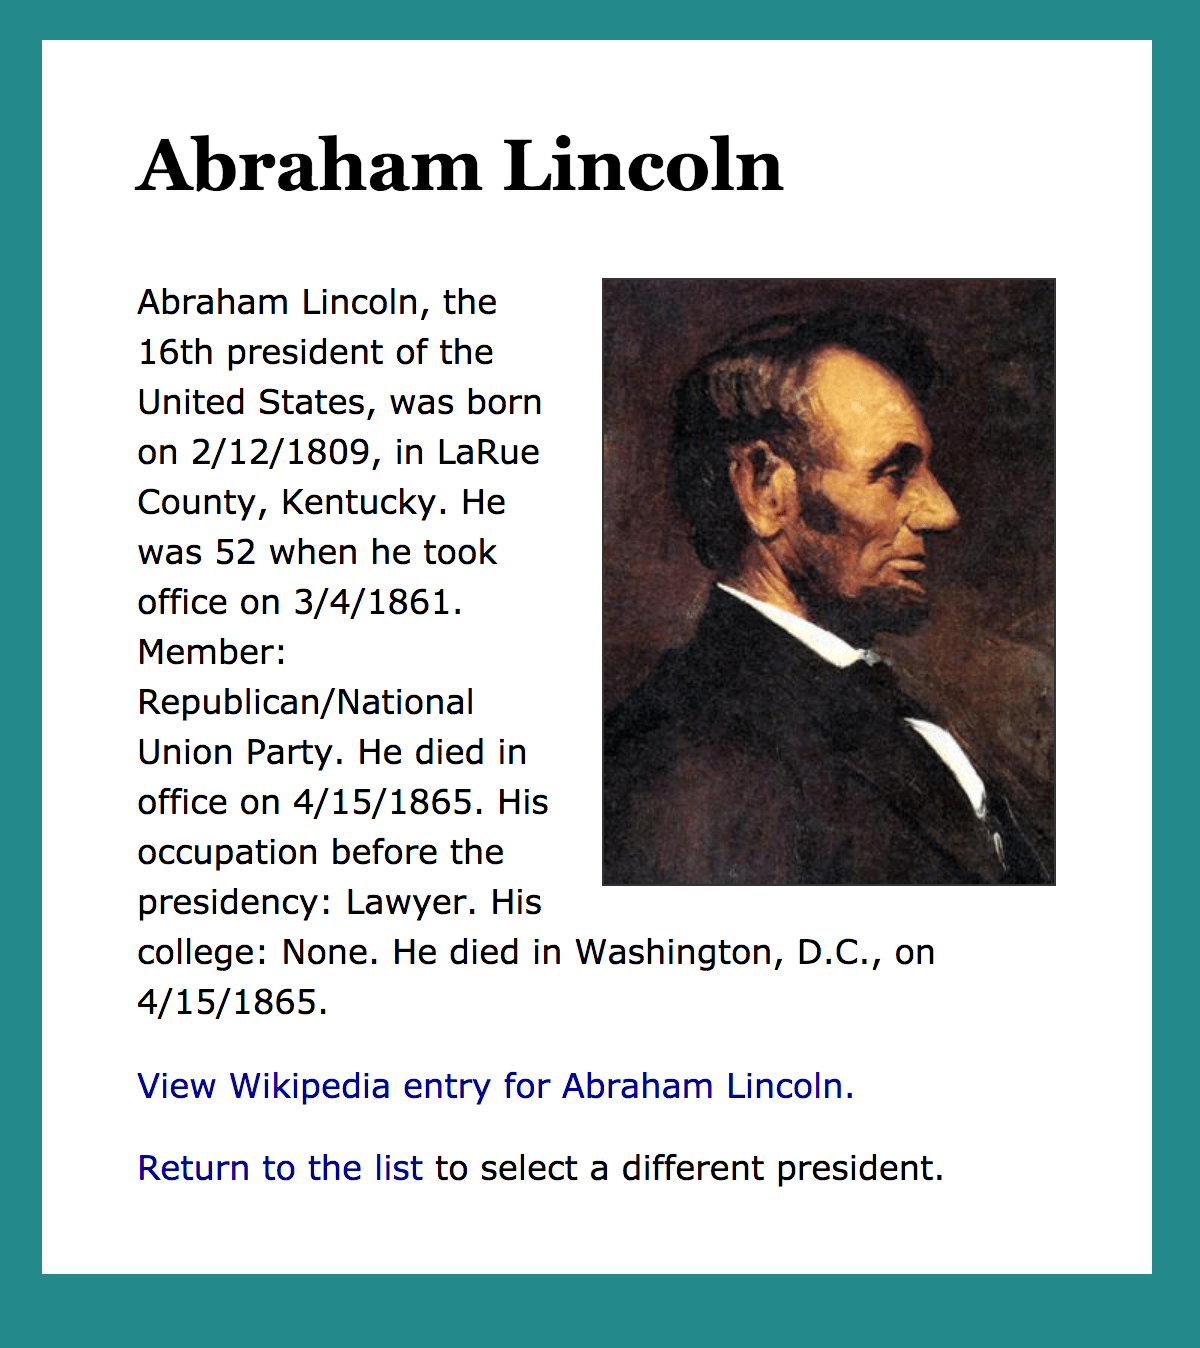
For example, we might want to build an app that includes all the U.S. presidents. Each president will have their own page, like this:
We do not want to build 45 pages by hand. We happen to have all the presidential data in a spreadsheet. Can we make one HTML template and be done?
Yes!
Here is an excerpt from that template:
<h1>{{ pres['President'] }}</h1>

<p>{{ pres['President'] }}, the {{ ord }} president of the
   United States, was born on {{ pres['Birth-date'] }}, in
   {{ pres['Birthplace'] }}. He was {{ pres['Age-when-took-office'] }}
   when he took office on {{ pres['Took-office'] }}. Member:
   {{ pres['Party'] }} Party.</p>
That might look slightly intimidating, but notice that inside each double-pair of curly braces is a key (in square brackets) that tells you exactly which information item will appear there. So, for Lincoln:
Abraham Lincoln, the 16th president of the United States, was born on 2/12/1809, in LaRue County, Kentucky. He was 52 when he took office on 3/4/1861. Member: Republican/National Union Party.
The spreadsheet was converted to a list of Python dictionaries — one dictionary per president. The dictionary for Lincoln looks like this:
{'Presidency': '16', 'President': 'Abraham Lincoln', 'Wikipedia-entry':
   'http://en.wikipedia.org/wiki/Abraham_Lincoln', 'Took-office': '3/4/1861',
   'Left-office': '4/15/1865', 'Party': 'Republican/National Union', 'Home-state':
   'Illinois', 'Occupation': 'Lawyer', 'College': 'None', 'Age-when-took-office':
   '52', 'Birth-date': '2/12/1809', 'Birthplace': 'LaRue County, Kentucky',
   'Death-date': '4/15/1865', 'Location-death': 'Washington, D.C.', 'Image': 'pr16.jpg'}
How does a Flask app use a template?
In the previous chapter, Flask, part 2, you saw this route function:
@app.route('/user/<name>')
def user(name):
    personal = f'<h1>Hello, {name}!</h1>'
    instruc = '<p>Change the name in the <em>browser address bar</em> \
        and reload the page.</p>'
    return personal + instruc
Let’s transform that so it uses a template.
Put the HTML into a template (note the double curly braces
{{ }}around name):<h1>Hello, {{ name }}!</h1> <p>Change the name in the <em>browser address bar</em> and reload the page.</p>Save the template file as hello.html in the templates folder.
Edit the route function. Remove the HTML. Change the return statement — call the
render_templatefunction. That is how we get the template!@app.route('/user/<name>') def user(name): return render_template('hello.html', name=name)
We must import the
render_templatemodule, so add it to the line at the top of the Flask app script:from flask import Flask, render_template
When you import more than one module from flask, you can put them on one line, separated by commas.
Note
The template needs to be a complete HTML file, with all the usual elements such as HTML, HEAD, and BODY. See the complete example below.
<!DOCTYPE html>
<html lang="en">
<head>
<meta charset="utf-8">
<meta name="viewport" content="width=device-width, initial-scale=1">
<title>Hello HTML Templates</title>
<link rel="stylesheet" href="{{ url_for('static', filename='main.css') }}">
</head>
<body>
<div>
<h1>Hello, {{ name }}!</h1>

<p>Change the name in the <em>browser address bar</em>
    and reload the page.</p>
</div>
</body>
</html>
Attention
In the HEAD above, in the LINK element, note the syntax for linking to a file in the static folder. The CSS file is just a normal CSS file, but it must be in the static folder for the Flask app.
Syntax for a path to a file in the static folder:
href="{{ url_for('static', filename='main.css') }}"
Syntax for a path to a file inside a folder in the static folder:
scr="{{ url_for('static', filename='images/foo.jpg') }}"
How are variables passed from app to template?
The templates in Flask are handled by the Jinja template engine, which comes with Flask when you first install it.
The render_template() function both selects the template file to be used and passes to it any values or variables it needs.
return render_template('example.html',
    name=name, phone=phone_number, state='FL')
We can pass as many variables as necessary to the template. In the example above, the template must contain variables for name, phone, and state. That is, these expressions must be somewhere in the template named example.html:
{{ name }}
{{ phone }}
{{ state }}
The value (on the right side of the equals sign) must come from the code in the Flask app file. In the example above, both name and phone_number must already have a value before the return render_template() line. Note that 'FL' is a string — we can pass in a string, integer, float, or Boolean.
It’s also possible to pass lists or dictionaries as values to a template. Here’s a line from the presidents app:
return render_template('president.html',
    pres=pres_dict, ord=ord, the_title=pres_dict['President'])
The template file is named president.html, and the values depend on a Python dictionary, pres_dict, that was defined earlier in the Flask app script. We can see the following expressions in the template’s HTML:
{{ ord }}
{{ pres['President'] }}
{{ pres['Birth-date'] }}
{{ pres['Birthplace'] }}
Why pres and not pres_dict? Because pres=pres_dict. In the render_template() function call, the dictionary pres_dict is assigned to the template’s variable pres. It is shorter and simpler for use in the template file.
If you need help understanding Python dictionaries, see the Dictionaries chapter. Dictionaries are incredibly useful for Flask templates!
In another template in the presidents app, base.html, we can see this expression in the HEAD element:
<title>{{ the_title }}</title>
Because of the_title=pres_dict['President'], the HTML TITLE element will be filled in with the value of the dictionary item that has the key 'President'.

Recall that the HTML TITLE is visible in the browser tab, as seen above.
Attention
If a template uses a lot of variables, it’s much shorter and easier to pass a dictionary to the template than to specify all the individual variables in the render_template() function.
Walkthrough of the presidents app
Now we will examine this app so you can build one like it yourself.
☞ View the live presidents app here.
☞ View the code for the presidents app.
Converting a CSV to a list of dictionaries
All the data we need about the U.S. presidents is in this CSV file.
Early in the Flask app in presidents.py, we create a list of dictionaries named presidents_list from that CSV. Each item in the list is a dictionary. Each dictionary contains all the data about ONE president. That is, each dictionary is equivalent to one row from the original CSV. (This is covered in the CSVs chapter.)
We can use presidents_list to:
Populate a template with all the data about a selected president.
Use a unique ID number — in the key
'Presidency'— to determine which president has been selected. This will be used in the Flask route:@app.route('/president/<num>')
Create a list of pairs in which each pair consists of the unique ID and the name of the president it belongs to. This will be used to create an HTML list of all the presidents’ names, which are links to the Flask route.
Here is the top of the presidents.py script:
1 2 3 4 5 6 7 8 | from flask import Flask, render_template
from modules import convert_to_dict, make_ordinal
app = Flask(__name__)
application = app
# create a list of dicts from a CSV
presidents_list = convert_to_dict("presidents.csv")
|
The list is created on line 8, using a function in an external file named modules.py. The function convert_to_dict() was imported from that file on line 2.
Tip
To store non-Flask functions in a separate .py file, you will import them by name from that file, as seen on line 2 in presidents.py. One more thing is required: In the folder that contains both presidents.py and modules.py there must also be a file named __init__.py. That file can be empty — but the name must be exactly as shown. More details here.
The route to one selected president
We will skip to the second route in the app and come back to the first one later.
24 25 26 27 28 29 30 31 32 | @app.route('/president/<num>')
def detail(num):
try:
pres_dict = presidents_list[int(num) - 1]
except:
return f"<h1>Invalid value for Presidency: {num}</h1>"
# a little bonus function, imported on line 2 above
ord = make_ordinal( int(num) )
return render_template('president.html', pres=pres_dict, ord=ord, the_title=pres_dict['President'])
|
Notice that the variable num is passed in the route. This was explained in Flask, part 2. The value of num determines which president we will see.
@app.route('/president/<num>')
Earlier, we saw that a URL for Abraham Lincoln ends with /president/16.
Recall that each president’s details are in a dictionary, and all the dictionaries are in a list. Recall that any list item can be accessed by its index (see Working with Lists).
However, the first index in a list is always 0.
To get George Washington, the first U.S. president, we need presidents_list[0]. But the route URL will end with /president/1 — because his Presidency (in the CSV) is 1. Therefore:
pres_dict = presidents_list[int(num) - 1]
That line (line 27) assigns the dictionary for the one selected president to the variable pres_dict. For the list index, int(num) - 1 changes num from a string to an integer and subtracts 1, so that the dictionary for George Washington, first president, comes from list item 0. (And the dictionary for Abraham Lincoln, 16th president, comes from list item 15, etc..)
Attention
This would not work for every possible list of dictionaries. In some cases you would need to search for a dictionary key to match the value passed to the function from the route URL.
Line 27 is in a try clause because it’s possible someone would manually change the URL to something invalid, such as /president/100. In that case, the except clause would run, and the screen would show the text “Invalid value for Presidency: 100” styled as an H1 heading.
Line 31 is a bonus because it takes the value of num (e.g. 1 for Washington or 16 for Lincoln) and converts it to an ordinal (e.g. 1st for Washington or 16th for Lincoln). The function make_ordinal() is in modules.py.
Finally, line 32 is the render_template() function we’ve seen before. The Flask template here is president.html. We know that pres_dict is the single dictionary for the selected president, and we pass it to the template as the variable pres because that’s shorter and simpler. We pass ord to the template as ord. For the HTML TITLE, we pass the value of pres_dict['President'] to the template as the_title.
Summary: The route tells Flask, “When this URL is received, run the following function.” Then everything up to the final return in the function is preparing the data that will be in the render_template() function. We also have an except clause, in case the route’s variable value is unusable.
The route to an index of presidents
Now we turn to the first route. This is the equivalent of an index, where the user selects a president. Then a request is sent to the server, and the page for that single president appears in the browser.
The web page needs to provide a list of links, one for each president.
To work, the partial URL for a president must contain the Presidency number. This was covered in the previous section — the URL for Abraham Lincoln, for example, ends with /president/16.
The link text is the president’s name. In the CSV, it is in the column named President.
12 13 14 15 16 17 18 19 20 | pairs_list = []
for p in presidents_list:
pairs_list.append( (p['Presidency'], p['President']) )
# first route
@app.route('/')
def index():
return render_template('index.html', pairs=pairs_list, the_title="Presidents Index")
|
A list of pairs (number, name) is created before the route function. It’s outside the route function because it only needs to run once and create the pairs_list list for the route function to use.
This is a simple route for the top page of the app:
@app.route('/')
Because pairs_list already exists, the function has only one instruction: to return render_template(). The render_template() function specifies the template named index.html (this is always the first thing inside the parentheses) and passes to it the pairs_list (assigned to pairs) and the string “Presidents Index” (assigned to the_title).
The presidents templates
There are three templates in this app:
index.html
president.html
base.html
base.html
We begin with base.html because it is used by both of the other templates.
1 2 3 4 5 6 7 8 9 10 11 12 13 14 15 16 17 18 19 20 21 22 23 24 | <!DOCTYPE html>
<html>
<head>
<meta charset="utf-8">
<meta name="viewport" content="width=device-width, initial-scale=1">
<title>{{ the_title }}</title>
<!-- note the special href for files in the Flask "static" folder -->
<link rel="stylesheet" href="{{ url_for('static', filename='css/main.css') }}">
</head>
<body>
<div id="container">
<!-- Jinja directives: page contents will go between them -->
{% block content %}
{% endblock %}
</div>
</body>
</html>
|
We already covered the code in lines 7 and 10 (earlier in this chapter):
Line 7: The value for the template variable
the_titlecomes from therender_template()function.Line 10: The value inside quotes following
href=is necessary for a functioning path to files inside the static folder.
What’s new: The Jinja directives on lines 18 and 19. These two commands, specific to the Jinja template language, designate the start and end of a block. The block in this case is named content. This same block name will be used in the other two templates in the presidents app.
Note
The block can be named something else (other than content). Up to you. Also, you can use more than one block in a template — but each block in a template must have its own unique name.
What is a block for? It is a place to insert other content.
Read on …
index.html
Right away, look at lines 3 and 20 below. Those are the same Jinja directives used in base.html — but here, they enclose the block to be inserted into base.html.
It works because of line 1 below:
1 2 3 4 5 6 7 8 9 10 11 12 13 14 15 16 17 18 19 20 | {% extends 'base.html' %}
{% block content %}
<h1>A presidential Flask example</h1>
<p>Click any president’s name.</p>
<!-- pairs is a list that must be sent here by a route function
The list will contain 45 pairs: a presidency number, and a
president's name -->
<ul>
{% for pair in pairs %}
<li><a href="{{ url_for( 'detail', num=pair[0] ) }}">{{ pair[1] }}</a></li>
{% endfor %}
</ul>
{% endblock %}
|
Because of line 1, when the render_template() function calls the template index.html, the first thing that happens is: line 1 fetches base.html and constructs a complete page from the two templates.
You’ll see the same thing in the president.html template, again using base.html.
The other Jinja code in index.html is used to build a list of links. This was described under The route to an index of presidents above.
First, the two Jinja directives on lines 15 and 17 designate the start and end of a for-loop. It is a Python for-loop, as you might realize when you see that it begins with for pair in pairs — but note, there is no colon.
Second, what is happening inside the for-loop? The list named pairs contains a tuple for each president. In each tuple are two values, a number and a name. Values in a tuple can be used with indexes, like values in a list. So pair[0] is the first value in the current tuple (a number), and pair[1] is the second value (a president’s name).
<li><a href="{{ url_for( 'detail', num=pair[0] ) }}">{{ pair[1] }}</a></li>
The for-loop writes a new LI element each time the loop runs.
The LI contains one A element.
The value of the HREF attribute is this string:
"{{ url_for( 'detail', num=pair[0] ) }}"The value inside
{{ }}writes, for example:/president/16.Because
pair[1]holds a president’s name, that name is the link text.The result of the loop looks like this:
<li><a href="/president/1">George Washington</a></li>
<li><a href="/president/2">John Adams</a></li>
<li><a href="/president/3">Thomas Jefferson</a></li>
<li><a href="/president/4">James Madison</a></li>
<li><a href="/president/5">James Monroe</a></li>
...
You might have wondered why the second route in presidents.py starts like this:
@app.route('/president/<num>')
def detail(num):
I wanted to demonstrate that the value of the HREF attribute must call the function, which here is detail() and not president().
When the HTTP request is http://localhost:5000/president/16, the function detail() receives the string value 16 as num.
The value of num retrieves the matching dictionary and returns it — with the template — as the HTTP response, and the browser displays the selected president’s page.
president.html
The detail page contains the most Jinja templating code, because it is writing all the values from one president’s dictionary (pres) into the HTML:
1 2 3 4 5 6 7 8 9 10 11 12 13 14 15 16 17 18 19 20 21 22 23 24 25 26 27 28 29 30 31 32 33 | {% extends 'base.html' %}
{% block content %}
<!-- the full dict for a president is sent here as pres by the route -->
<h1>{{ pres['President'] }}</h1>
<!-- NOTE the pattern for pointing to a file inside the static folder -->
<img class="right" src="{{ url_for('static', filename='images/' + pres['Image']) }}" alt="President portrait">
<p>{{ pres['President'] }}, the {{ ord }} president of the United States, was born on {{ pres['Birth-date'] }}, in {{ pres['Birthplace'] }}. He was {{ pres['Age-when-took-office'] }} when he took office on {{ pres['Took-office'] }}. Member: {{ pres['Party'] }} Party.
{% if pres['Death-date'] == pres['Left-office'] %}
He died in office on {{ pres['Death-date'] }}.
{% elif pres['Left-office'] != 'Incumbent'%}
He left office on {{ pres['Left-office'] }}.
{% endif %}
His occupation before the presidency: {{ pres['Occupation'] }}.
His college: {{ pres['College'] }}.
{% if pres['Location-death'] != "NA" %}
He died in {{ pres['Location-death'] }}, on {{ pres['Death-date'] }}.
{% endif %}
</p>
<p><a href="{{ pres['Wikipedia-entry'] }}">View Wikipedia entry for {{ pres['President'] }}.</a></p>
<!-- NOTE the way to link to a route: Use the function name -->
<p><a href="{{ url_for('index') }}">Return to the list</a> to select a different president.</p>
{% endblock %}
|
This template inserts itself into base.html because of lines 1, 3 and 33. Those are Jinja block directives, already discussed above.
In index.html you saw a Python for-loop in Jinja. Here you can see conditional statements — if and elif. This is especially powerful because we can read the values from the dictionary pres and change what is written into the HTML depending on (for example) whether the president has died or is still living.
Line 14 checks whether the value of Death-date is the same as the value of Left-office. If so, this president died in office.
Line 16 checks whether the value of Left-office is Incumbent. If not, then this president has left office, and a sentence will be inserted. If so, then no sentence will be inserted.
Line 18 ends the if-else sequence. This is required.
Line 23 checks the value of Location-death. If the value is not NA, then this president has died, and a sentence will be written. Otherwise, no sentence is written here.
Line 25 ends the if-else sequence. This is required.
Resources
For answers to any questions about writing templates or using the Jinja template language:
Jinja documentation — All the commands for the Jinja template syntax are here.
Flask documentation for
render_template().
Summary
Using Flask to ingest a URL and return a templated web page requires us to consider the data source (a CSV in the presidents app), the layout of the page, and the variables we need to send to the page.
A Flask route function can be long or short, and if it returns
render_template()it needs to send not only the name of the template but also the variables required by that template.In templates, partial URLs are written in very particular ways to work with the Jinja template engine. These include all URLs that lead to assets inside the static folder, such as images, CSS files, and JavaScript files.
Any link that corresponds to a route that includes a variable requires particular Jinja syntax, as seen in index.html.
Jinja directives can be used to insert Python commands into a template. These include for-loops and conditionals (if, elif, else). You might notice this resembles PHP syntax.
Templates can be modular. In the presidents app, base.html contains HTML for the top and bottom segments of two different pages. The middle segment is inserted by either index.html or president.html.
Note
Data sources other than CSV files — including databases — can be used with Flask.
.