Flask: Web Forms
Updated April 11, 2024
Previous:
Flask intro: A very simple Flask app
Flask, part 2: Values in routes; using an API
Flask templates: Write HTML templates for a Flask app
Flask: Deploy an app: How to put your finished app online
Code for this chapter is here.
In the Flask Templates chapter, we built a functioning Flask app. In this chapter, we’ll explore how to add functional web forms to a similar app.

Flask forms app example (flask_actors_app):
Introduction
Flask has an extension that makes it easy to create web forms.
WTForms is “a flexible forms validation and rendering library for Python Web development.” With Flask-WTF, we get WTForms in Flask.
WTForms includes security features for submitting form data.
WTForms has built-in validation techniques.
WTForms can be combined with Bootstrap to help us make clean-looking, responsive forms for mobile and desktop screens.
WTForms is a Python library.
Flask-WTF is a Flask extension that brings WTForms into Flask.
Setup for using forms in Flask
We will install the Flask-WTF extension to help us work with forms in Flask. There are many extensions for Flask, and each one adds a different set of functions and capabilities. See the list of Flask extensions for more.
In Terminal, change into your Flask projects folder and activate your virtual environment there. Then, at the command prompt — where you see $ (Mac) or C:\Users\yourname> (Windows )—
pip install Flask-WTF
We will also install the Bootstrap-Flask extension to provide Bootstrap styles for our forms.
pip install bootstrap-flask
This installation is done only once in any virtualenv. It is assumed you already have Flask installed there.
More details in WTForms docs
The Bootstrap-Flask GitHub repository has good examples for forms; look at the README
Imports for forms with Flask-WTF and Bootstrap-Flask
You will have a long list of imports at the top of your Flask app file:
from flask import Flask, render_template, redirect, url_for
from flask_bootstrap import Bootstrap5

from flask_wtf import FlaskForm, CSRFProtect
from wtforms import StringField, SubmitField
from wtforms.validators import DataRequired, Length
Note as always that Python is case-sensitive, so upper- and lowercase must be used exactly as shown. The wtforms import will change depending on your form’s contents. For example, if you have a SELECT element, you’ll need to import that. See a simplified list of WTForms form field types or further explanation in the WTForms documentation.
Set up a form in a Flask app
After the imports, these lines follow in the app script:
app = Flask(__name__)
app.secret_key = 'tO$&!|0wkamvVia0?n$NqIRVWOG'

# Bootstrap-Flask requires this line
bootstrap = Bootstrap5(app)
# Flask-WTF requires this line
csrf = CSRFProtect(app)
Flask allows us to set a “secret key” value. This value is used to prevent malicious hijacking of your form from an outside submission. A better way to do it:
import secrets
foo = secrets.token_urlsafe(16)
app.secret_key = foo
Flask-WTF’s FlaskForm will automatically create a secure session with CSRF (cross-site request forgery) protection if this key-value is set and the csrf variable is set. Don’t publish an actual key on GitHub!
You can read more about the secret key in this StackOverflow post.
Configure the form
Next, we configure a form that inherits from Flask-WTF’s class FlaskForm. Python style dictates that a class starts with an uppercase letter and uses camelCase, so here our new class is named NameForm (we will use the form to search for a name).
In the class, we assign each form control to a unique variable. This form has only one text input field and one submit button.
Every form control must be configured here.
class NameForm(FlaskForm):
    name = StringField('Which actor is your favorite?', validators=[DataRequired(), Length(10, 40)])
    submit = SubmitField('Submit')
Learn more about classes in Python here.
If you had more than one form in the app, you would define more than one new class in this manner.
Note that StringField and SubmitField were imported at the top of the file. If we needed other form-control types in this form, we would need to import those also. See a simplified list of WTForms form field types or further explanation in the WTForms documentation.
Note that several field types (such as RadioField and SelectField) must have an option choices=[] specified. Within the list, each choice is a pair in this format: ('string-form-variable-name', 'string-label-text').
category = RadioField('Choose a detail to search:', validators=[InputRequired(message=None)],
choices=[ ('President', 'President\'s Name, e.g. John'), ('Home-state', 'Home State, e.g. Virginia'),
('Occupation', 'Occupation, e.g. Lawyer'), ('College', 'College, e.g. Harvard')] )
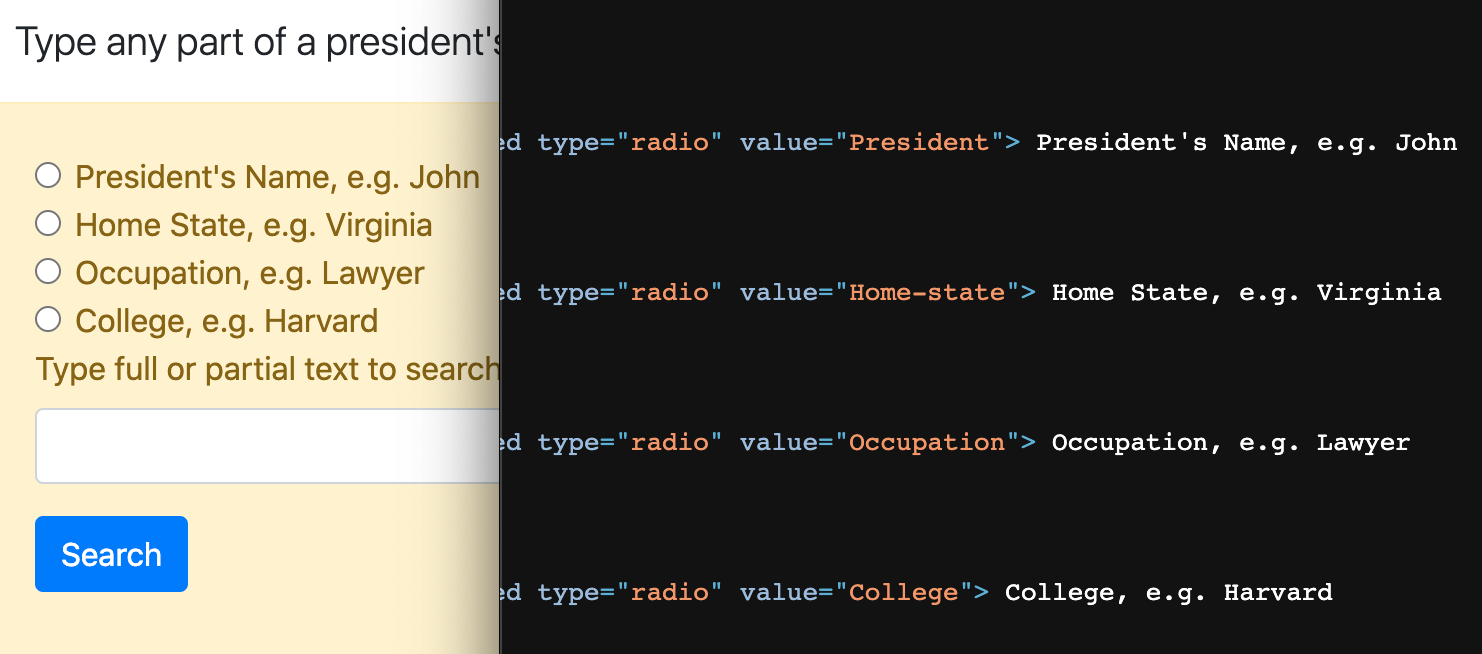
Here is a live form page shown beside the rendered source code for choices.

Live app (Presidents) (it will take about a minute to load)
For more help with the FlaskForm class, see this Bootstrap-Flask page. It shows great examples with the exact code needed.
WTForms also has a long list of validators we can use. The DataRequired() validator prevents the form from being submitted if that field is empty. Note that these validators must also be imported at the top of the file. Validators and custom validators are discussed further in the WTForms documentation.
Put the form in a route function
Now we will use the form in a Flask route:
29 30 31 32 33 34 35 36 37 38 39 40 41 42 43 44 45 46 | @app.route('/', methods=['GET', 'POST'])
def index():
names = get_names(ACTORS)
# you must tell the variable 'form' what you named the class, above
# 'form' is the variable name used in this template: index.html
form = NameForm()
message = ""
if form.validate_on_submit():
name = form.name.data
if name.lower() in names:
# empty the form field
form.name.data = ""
id = get_id(ACTORS, name)
# redirect the browser to another route and template
return redirect( url_for('actor', id=id) )
else:
message = "That actor is not in our database."
return render_template('index.html', names=names, form=form, message=message)
|
A crucial line is where we assign our configured form object to a new variable:
form = NameForm()
We must also pass that variable to the template, as seen in the final line above.
Be aware that if we had created more than one form class, each of those would need to be assigned to a unique variable. (They cannot all be named form.)
Put the form in a template
Before we break all that down and explain it, let’s look at the code in the template index.html:
1 2 3 4 5 6 7 8 9 10 11 12 13 14 15 16 17 18 19 20 21 22 23 24 25 26 27 28 29 30 31 32 33 | {% extends 'base.html' %}
{% from 'bootstrap5/form.html' import render_form %}
{% block title %}
Best Movie Actors
{% endblock %}
{% block content %}
<!--
TIPS about using Bootstrap-Flask:
https://github.com/helloflask/bootstrap-flask
https://bootstrap-flask.readthedocs.io/
-->
<div class="container">
<div class="row">
<div class="col-md-10 col-lg-8 mx-lg-auto mx-md-auto">
<h1 class="pt-5 pb-2">Welcome to the best movie actors Flask example!</h1>
<p class="lead">This is the index page for an example Flask app using Bootstrap and WTForms. Note that <em>only 100 actors</em> are in the data source. Partial names are not valid.</p>
{{ render_form(form) }}
<p class="pt-5"><strong>{{ message }}</strong></p>
</div>
</div>
</div>
{% endblock %}
|
Where is the form? This is the amazing thing about Flask-WTF — by configuring the form as we did in the Flask app, we can generate a form with Bootstrap styles in HTML using nothing more than the template you see above. Line 25 is the form.

Note that in the Flask route function, we passed the variable form to the template index.html:
return render_template('index.html', names=names, form=form, message=message)
When you use {{ render_form(form) }}, the argument inside the parentheses must be the variable that represents the form you created in the app.
form = NameForm()
We discussed the configuration of NameForm above.
A quick note about Bootstrap in Flask
There’s more about this in the Resources section at the bottom of this page — but to summarize briefly:
You pip-installed Bootstrap-Flask in your Flask virtual environment.
You wrote
from flask_bootstrap import Bootstrap5at the top of the Flask app file.Below that, you wrote
bootstrap = Bootstrap5(app)in the Flask app file.In the Flask template index.html, the top line is:
{% from 'bootstrap5/form.html' import render_form %}
That combination of four things has embedded Bootstrap 5 in this app and made {{ render_form() }} possible.
Note that it is possible to use Bootstrap-Flask without any forms! The actors app demonstrates how the usual Bootstrap classes such as container and row can be used in Flask templates.
Examining the route function
Before reading further, try out a working version of this app. The complete code for the app is on GitHub (updated April 2024).
You type an actor’s name into the form and submit it. Try Willem Dafoe, Viola Davis, Morgan Freeman, or Kate Winslet (there are only 100 names).
If the actor’s name is in the data source (ACTORS), the app loads a detail page for that actor. (Photos of bears 🐻 stand in for real photos of the actors.)
Otherwise, you stay on the same page, the form is cleared, and a message tells you that actor is not in the database.
29 30 31 32 33 34 35 36 37 38 39 40 41 42 43 44 45 46 | @app.route('/', methods=['GET', 'POST'])
def index():
    names = get_names(ACTORS)
# you must tell the variable 'form' what you named the class, above
# 'form' is the variable name used in this template: index.html
form = NameForm()
message = ""
if form.validate_on_submit():
    name = form.name.data
if name.lower() in names:
# empty the form field
form.name.data = ""
id = get_id(ACTORS, name)
# redirect the browser to another route and template
return redirect( url_for('actor', id=id) )
else:
message = "That actor is not in our database."
return render_template('index.html', names=names, form=form, message=message)
|
First we have the route, as usual, but with a new addition for handling form data: methods.
@app.route('/', methods=['GET', 'POST'])
Every HTML form has two possible methods, GET and POST. GET simply requests a response from the server. POST, however, sends a request with data attached in the body of the request; this is the way most web forms are submitted.
This route needs to use both methods because when we simply open the page, no form was submitted, and we’re opening it with GET. When we submit the form, this same page is opened with POST if the actor’s name (the form data) was not found. Thus we cannot use only one of the two options here.
def index():
names = get_names(ACTORS)
At the start of the route function, we get the data source for this app. It happens to be in a list named ACTORS, and we get just the names by running a function, get_names(). The function was imported from the file named modules.py.
form = NameForm()
message = ""
We assign the previously configured form object, NameForm(), to a new variable, form. This has been discussed above.
We create a new, empty variable, message.
if form.validate_on_submit():
name = form.name.data
validate_on_submit() is a built-in WTForms function, called on form (our variable). If it returns True, the following commands and statements in the block will run. If not, the form is simply not submitted, and invalid fields are flagged. It will return True if the form was filled in and submitted.
form.name.data is the contents of the text input field represented by name. Perhaps we should review how we configured the form:
class NameForm(FlaskForm):
   name = StringField('Which actor is your favorite?', validators=[DataRequired(), Length(10, 40)])
   submit = SubmitField('Submit')
That name is the name in form.name.data — the contents of which we will now store in a new variable, name. To put it another way: The variable name in the app now contains whatever the user typed into the text input field on the web page — that is, the actor’s name.
38 39 40 41 42 43 44 45 | if name.lower() in names:
# empty the form field
form.name.data = ""
id = get_id(ACTORS, name)
# redirect the browser to another route and template
return redirect( url_for('actor', id=id) )
else:
message = "That actor is not in our database."
|
This if-statement is specific to this app. It checks whether the name (that was typed into the form) matches any name in the list names. If not, we jump down to else and text is put into the variable message. If name DOES match, we clear out the form, run a function called get_id() (from modules.py) and — important! — open a different route in this app:
return redirect( url_for('actor', id=id) )
Thus redirect( url_for('actor', id=id) ) is calling a different route here in the same Flask app script. (See actors.py, lines 48-57.) The redirect() function is specifically for this use, and we imported it from the flask module at the top of the app. We also imported url_for(), which you have seen previously used within templates.
As far as using forms with Flask is concerned, you don’t need to worry about the actors and their IDs, etc. What is important is that the route function can be used to evaluate the data sent from the form. We check to see whether it matched any of the actors in a list, and a different response will be sent based on match or no match.
Any kind of form data can be handled in a Flask route function.
You can do any of the things that are typically done with HTML forms — handle usernames and passwords, write new data to a database, create a quiz, etc.
The final line in the route function calls the template index.html and passes three variables to it:
return render_template('index.html', names=names, form=form, message=message)
Conclusion
Flask-WTF provides convenient methods for working with forms in Flask. Forms can be built easily and also processed easily, with a minimum of code.
Adding Bootstrap-Flask ensures that we can build mobile-friendly forms with a minimum amount of effort.
Note that it is possible to build a customized form layout using Bootstrap styles in a Flask template, or to build a custom form with no Bootstrap styles. In either of those two cases, you cannot use {{ render_form(form) }} but would instead write out all the form code in your Flask template as you would in a normal HTML file. To take advantage of WTForms, you would still create the form class with FlaskForm in the same way as shown above.
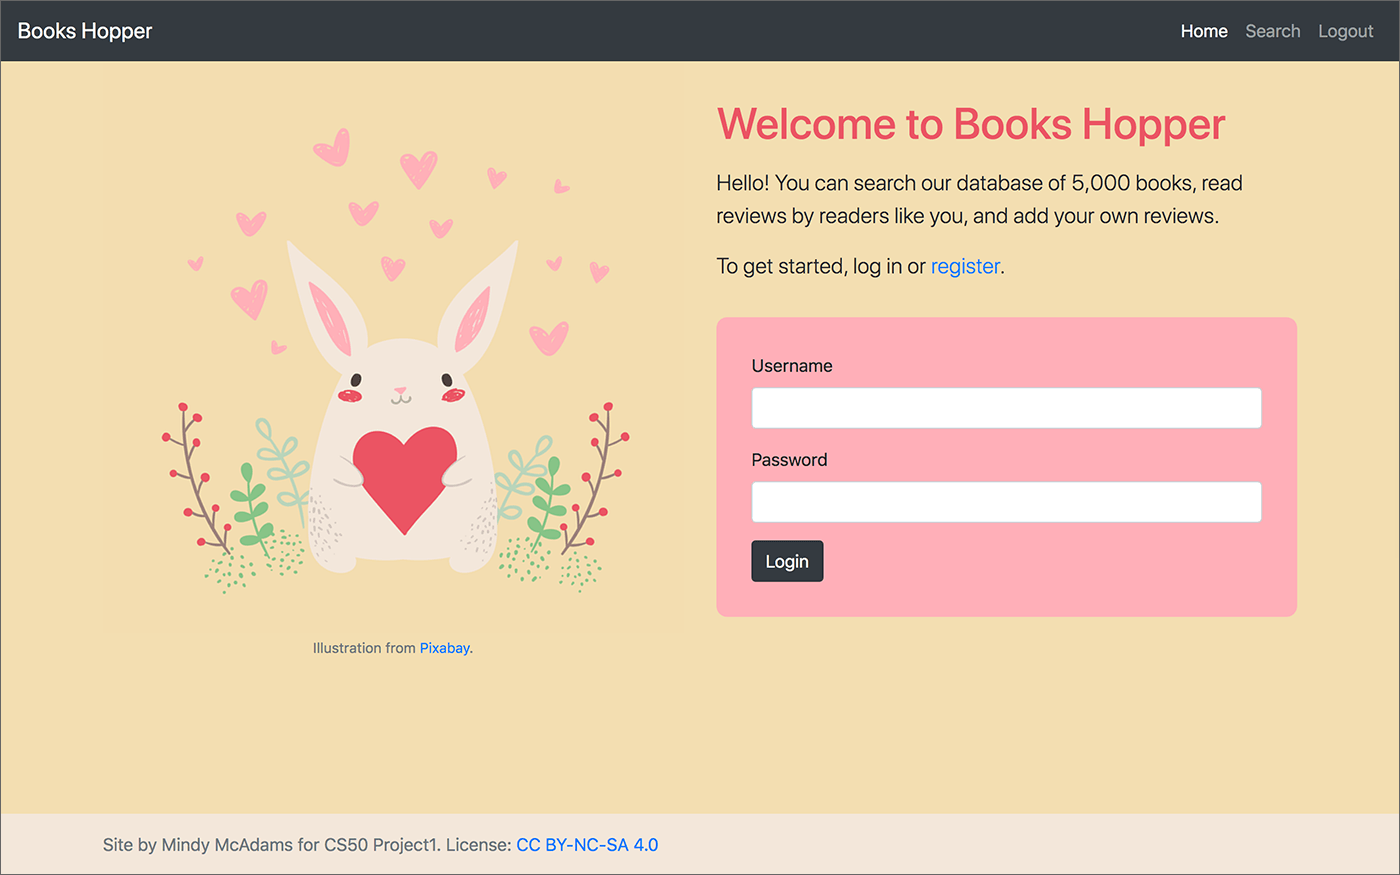
An example is the demo Flask app Books Hopper, which includes four separate Bootstrap forms:
a login form
a registration form
a search form
a form for writing a book review and selecting a rating

Bootstrap 4 was used in all templates in the Books Hopper app, but Bootstrap-Flask was not. Bootstrap styles were all coded in the usual ways.