Flask: Read from a Database
Major update: April 11, 2023. All URLs checked and updated: April 10, 2024.
It is essential to get your database connection working without errors before you try to do more with the database and Flask.
Refer to the previous chapter to test your database connection.
In this chapter we focus on reading data from a SQLite database, using Flask-SQLAlchemy.
The database
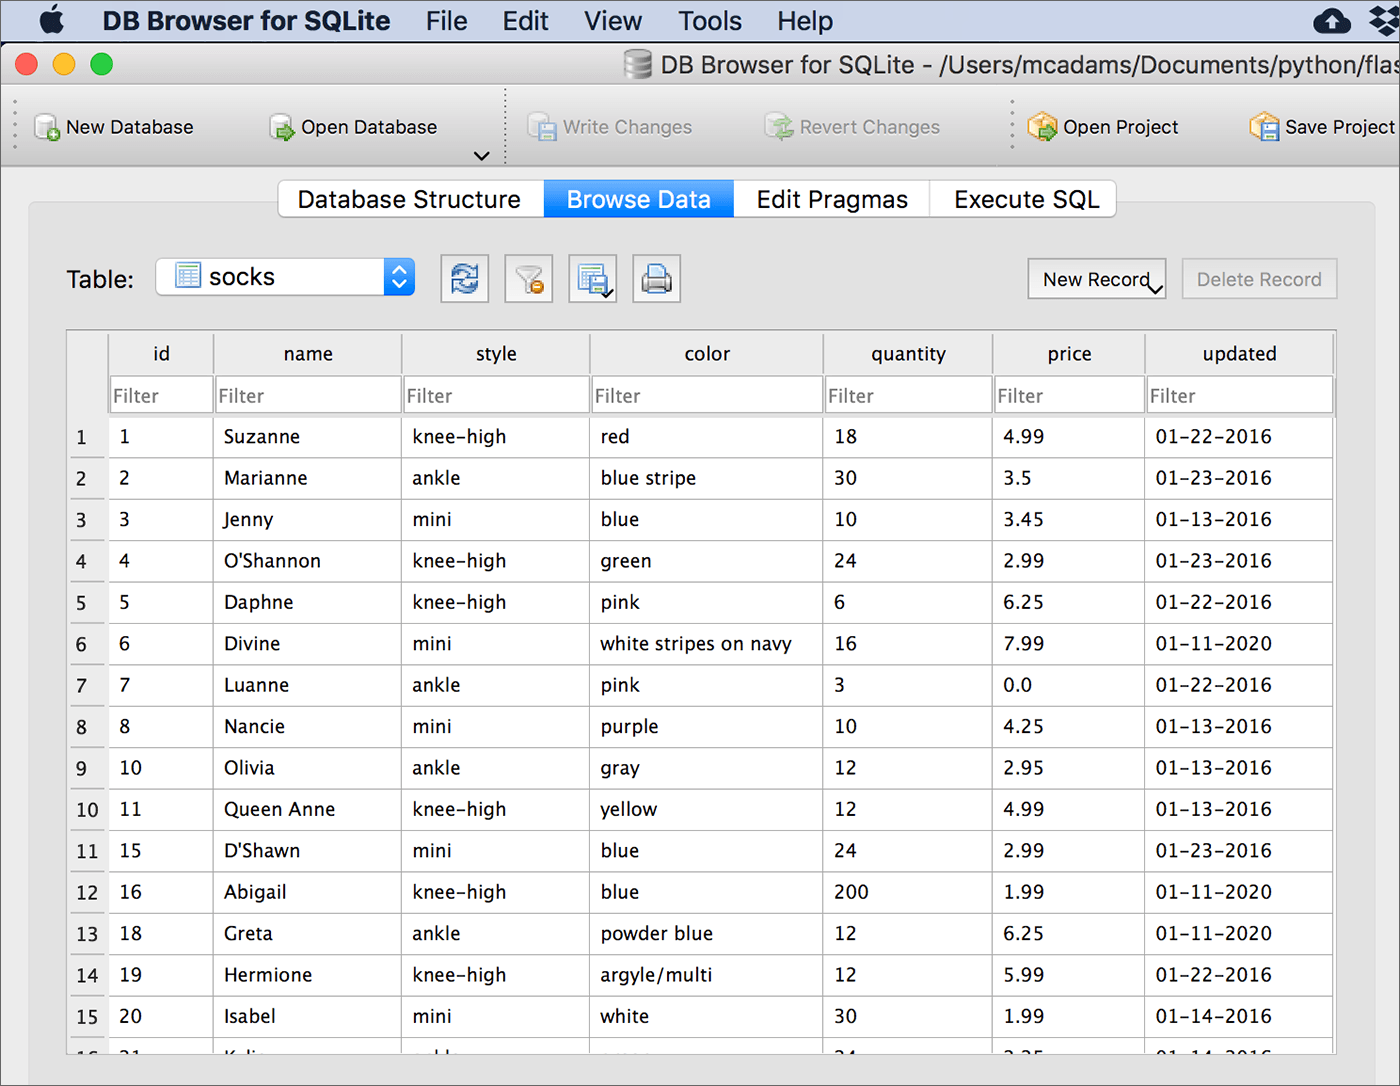
The SQLite database used here is named sockmarket.db. It has only one table, named socks. It has seven fields: id, name, style, color, quantity, price, and updated. You will see the table name and the field names later, in the Python code. The image below is a screenshot from the DB Browser for SQLite, showing the top rows of the socks table.
First read
Without templates or anything fancy, let’s attempt to read some data from the database and return it in the browser.
1 2 3 4 5 6 7 8 9 10 11 12 13 14 15 16 17 18 19 20 21 22 23 24 25 26 27 28 29 30 31 32 33 34 35 36 37 38 39 40 | """ read from a SQLite database and return data """
from flask import Flask
from flask_sqlalchemy import SQLAlchemy
import os.path
# this variable, db, will be used for all SQLAlchemy commands
db = SQLAlchemy()
# create the app
app = Flask(__name__)
# change string to the name of your database; add path if necessary
db_name = 'sockmarket.db'
# note - path is necessary for a SQLite db!!!
BASE_DIR = os.path.dirname(os.path.abspath(__file__))
db_path = os.path.join(BASE_DIR, db_name)
app.config['SQLALCHEMY_DATABASE_URI'] = 'sqlite:///' + db_path
app.config['SQLALCHEMY_TRACK_MODIFICATIONS'] = True
# initialize the app with Flask-SQLAlchemy
db.init_app(app)
# each table in the database needs a class to be created for it
# this class is named Sock because the database contains info about socks
# and the table in the database is named: socks
# db.Model is required - don't change it
# identify all columns by name and their data type
class Sock(db.Model):
__tablename__ = 'socks'
id = db.Column(db.Integer, primary_key=True)
name = db.Column(db.String)
style = db.Column(db.String)
color = db.Column(db.String)
quantity = db.Column(db.Integer)
price = db.Column(db.Float)
updated = db.Column(db.String)
#routes
|
Everything up to line 22 comes from the script explained in the previous chapter.
The model
Lines 30-38 provide a model so that Python can translate the socks table. It’s a Python class that inherits from the Model class from SQLAlchemy. (Remember, db refers to SQLAlchemy.) We could name the new class anything, but Sock makes sense because this table’s data is all about socks.
Note
Python style dictates that a class starts with an uppercase letter and uses camelCase. Using uppercase (as in Sock here) helps us recognize when a class is being used in Python.
If your database has more than one table, you will need to create an additional class like this for each additional table.
Note the following in the highlighted class above:
Identify the primary_key field as shown (line 32).
Write the field names exactly as they appear in the table.
In
__tablename__ = 'socks', note that the name of the table is case-sensitive. Match it to your actual table’s name.String,IntegerorFloatmust match the data type in your fields.Include every field in the table.
The query in the route
We will provide only one route to start with, and it includes a try/except just like the example in the previous chapter.
40 41 42 43 44 45 46 47 48 49 50 51 52 53 54 55 56 57 58 59 | #routes
@app.route('/')
def index():
try:
socks = db.session.execute(db.select(Sock)
.filter_by(style='knee-high')
.order_by(Sock.name)).scalars()
sock_text = '<ul>'
for sock in socks:
sock_text += '<li>' + sock.name + ', ' + sock.color + '</li>'
sock_text += '</ul>'
return sock_text
except Exception as e:
# e holds description of the error
error_text = "<p>The error:<br>" + str(e) + "</p>"
hed = '<h1>Something is broken.</h1>'
return hed + error_text
|
Important
The database query shown above, lines 45-47, retrieves all columns in all rows where the value in the style column is ‘knee-high’ — those rows are assigned to the variable named socks.
The only code that “talks” to the database is in lines 45-47.
socksis a new variable. We assign to it the data we are pulling from the database.Sock(uppercase S) refers to the class we built, Sock, starting on line 30. We are querying the table specified in that class..filter_by()limits what we’re asking for. It’s theWHEREclause in regular SQL.style='knee-high'— in this table,styleis a field name.'knee-high'is a value in that field (column). So we will get only socks with the style “knee-high” — not “ankle,” mini,” or “other.”order_by()selects a field (column) to determine the order of the results listing. This is optional. Any field could be used.Sock.namerefers to the propertynamein the Sock class..scalars()is tacked onto the end of every query, unless you expect or want only one record to be returned — in which case, use.scalar_one()instead.
The default for order_by() is ascending. To sort by a column in descending order:
from sqlalchemy import desc
socks = db.session.execute(db.select(Sock)
   .filter_by(style='knee-high')
   .order_by( desc(Sock.name) )).scalars()
Lines 49-52 create a string using the data in socks and adding HTML tags around the data — the <ul> and <li> tags should be familiar to you.
After the for-loop completes, and the final closing tag </ul> is concatenated to the string, sock_text, and the final string will be:
<ul><li>D'Shawn, blue</li><li>Divine, white stripes on navy</li><li>Faye, dark purple</li>
<li>Isabel, white</li><li>Jenny, blue</li><li>Jo-Anne, brown</li><li>Krissie, blue</li>
<li>Lizzy, red</li><li>Nancie, purple</li><li>Tanya, red</li><li>Terrie, blue stripe</li></ul>
Assuming that everything worked, that string is what will be returned (line 53).
The rest of the code (lines 54-58) is from the database intro chapter.
When the script runs, this is the result in the browser:
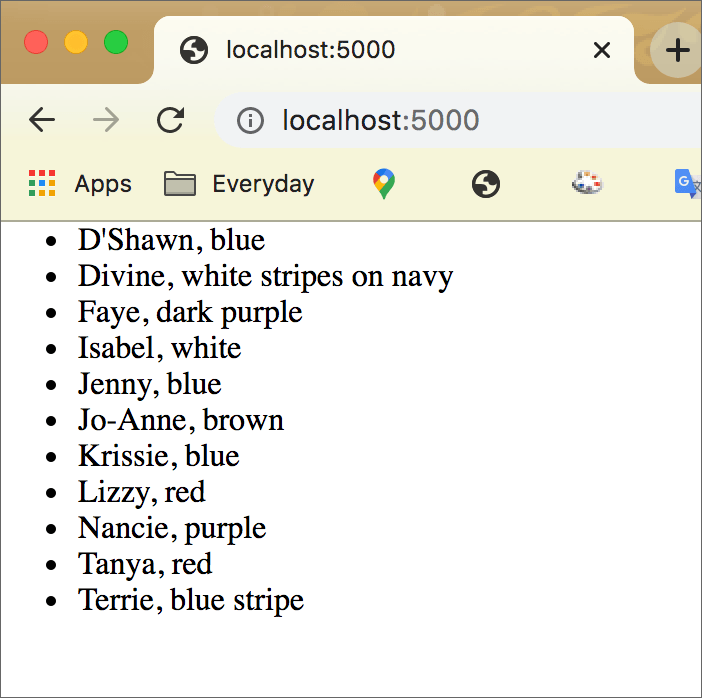
We have successfully queried data from this database and used it in a Flask route.
Now we will put it into a Flask template.
Add a template
Using a Flask template, we can make the list of socks display more beautifully:
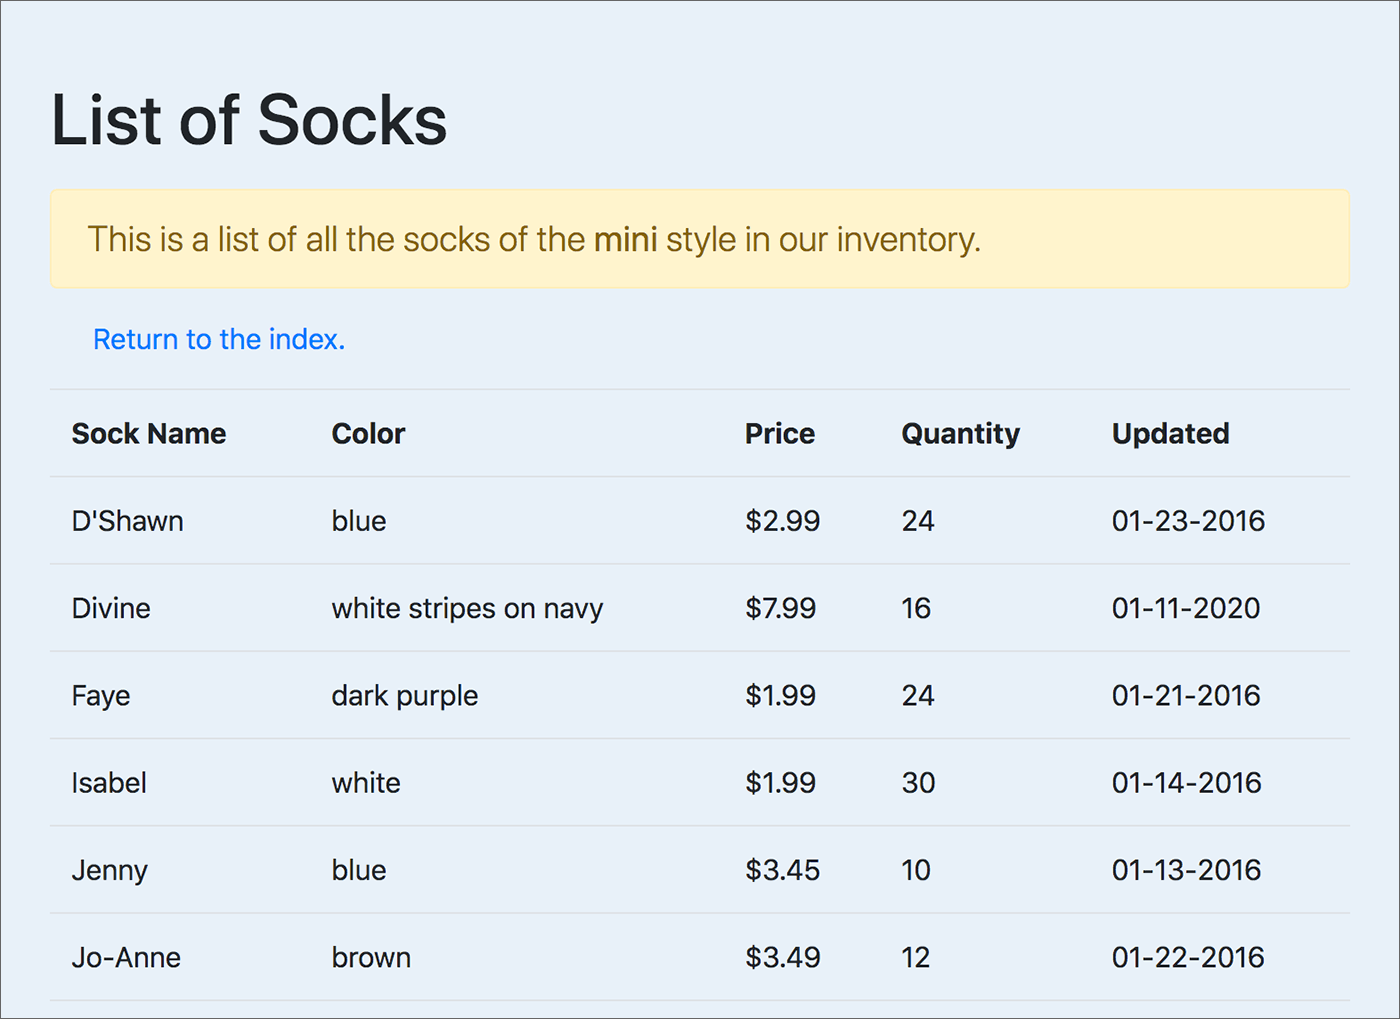
Important
The database query for the table shown above is in the route function inventory(). The code is shown below.
Here is the central section of the HTML template that will display the socks. Instead of using an HTML list with <ul> and <li> tags, we’re using the standard HTML table tags with Bootstrap styles applied.
15 16 17 18 19 20 21 22 23 24 25 26 27 28 29 30 31 32 33 34 35 36 37 38 39 40 41 | <h1 class="pt-5 pb-2">List of Socks</h1>
<p class="lead alert alert-warning">This is a list of all the socks of the
<strong>{{ style }}</strong> style in our inventory.</p>
<p class="ml-4"><a href="{{ url_for('index') }}">Return to the index.</a></p>
<table class="table">
<tr>
<th>Sock Name</th>
<th>Color</th>
<th>Price</th>
<th>Quantity</th>
<th>Updated</th>
</tr>
<!-- here is a for-loop to give us all the socks -->
{% for sock in socks %}
<tr>
<td>{{ sock.name }}</td>
<td>{{ sock.color }}</td>
<td>${{ sock.price }}</td>
<td>{{ sock.quantity }}</td>
<td>{{ sock.updated }}</td>
</tr>
{% endfor %}
</table>
|
Refer to the Flask: Web Forms chapter for details about adding Bootstrap to Flask. Refer to the Flask Templates chapter for details about working with templates.
The entire app, including its templates and the database file, is here.
The previous route
Our first working route with no template was this:
@app.route('/')
def index():
  try:
      socks = db.session.execute(db.select(Sock)
          .filter_by(style='knee-high')
          .order_by(Sock.name)).scalars()

      sock_text = '<ul>'
      for sock in socks:
          sock_text += '<li>' + sock.name + ', ' + sock.color + '</li>'
      sock_text += '</ul>'
      return sock_text
  # lines omitted here
Note that the database query is the same below, in the new route that uses a Flask template.
The new route
If you refer to the Jinja code in the template above, you will see that it requires a value for style — {{ style }} and the value socks — used in the for-loop. (Those lines are highlighted.)
In the render_template() function returned by this route (below), you can see that these values are passed to the template.
@app.route('/inventory/<style>')
def inventory(style):
    socks = db.session.execute(db.select(Sock)
            .filter_by(style=style)
            .order_by(Sock.name)).scalars()
    return render_template('list.html', socks=socks, style=style)
The one difference in the database query is that instead of getting only records for which the style is 'knee-high', here the value for style comes from a route variable. This technique is covered in the templates chapter.
A different database query
If you’re familiar with SQL, you know there are many different kinds of queries we can write against a database. All of them can be constructed one way or another with Flask-SQLAlchemy.
Search the ORM Querying Guide in the SQLAlchemy documentation when you need to work out the syntax for an unusual query.
As an example, let’s see how to get this result for the index page of the socks app:
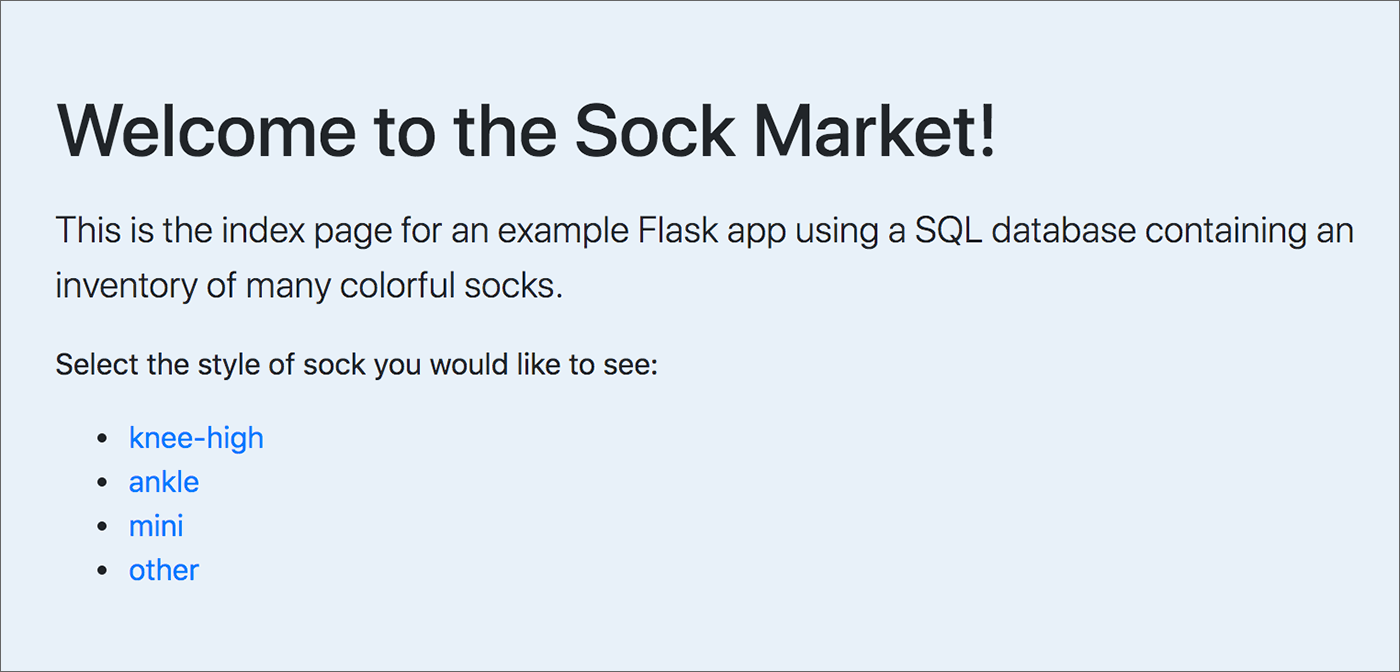
We might know exactly which styles are available in this database — but what if we don’t know? What if we expect new styles to be added without warning? Then we cannot hard-code the style values into the page you see above. Someday there might be a fifth style. We need to extract the styles from the database itself.
43 44 45 46 47 48 49 | @app.route('/')
def index():
# get a list of unique values in the style column
styles = db.session.execute(db.select(Sock)
.with_only_columns(Sock.style).distinct())
return render_template('index.html', styles=styles)
|
Above is the route for the index (or starting page) of the app. It calls the template named index.html, which you can see in part below. But focus your attention on the database query in lines 46-47.
The
with_only_columnsmethod restricts the columns returned to only the one(s) you want. In this case, we want only the style column.The
distinct()method returns only unique values in the specified column.
Therefore, the contents of the new variable styles in line 46 above are one instance of each unique value in the style column. By passing styles to the template index.html, we can use those values to create a list of links.
15 16 17 18 19 20 21 22 23 24 25 | <h1 class="pt-5 pb-2">Welcome to the Sock Market!</h1>
<p class="lead">This is the index page for an example Flask app using a SQL database containing an inventory of many colorful socks.</p>
<p>Select the style of sock you would like to see:</p>
<ul>
{% for s in styles %}
<li><a href="{{ url_for( 'inventory', style=s.style ) }}">{{ s.style }}</a></li>
{% endfor %}
</ul>
|
Above is the HTML in the index.html template. The list styles came from the route, and we can loop over the list with a Jinja directive.
The URL value for href= must be encoded for Flask (line 23). This was covered in the templates chapter.
In line 23, both the href= value and the text that is linked use the same value from styles. As we loop over styles, the current record is s — so the value in the style column is accessed with s.style. Because the list styles contains only unique values from the style column, each different style appears only once.
The URL that executes the other route function in this app is:
/inventory/<style>
You’ve seen this kind of Flask route before:
/president/<num>
The result of clicking knee-high on the index page is that the following HTTP request is sent to the server:
localhost:5000/inventory/knee-high
The HTTP response comes from this route in the app script, with the value of style now being knee-high:
@app.route('/inventory/<style>')
def inventory(style):
    try:
      socks = db.session.execute(db.select(Sock)
          .filter_by(style=style)
          .order_by(Sock.name)).scalars()
      return render_template('list.html', socks=socks, style=style)
In the browser, the list.html template will be loaded, displaying a table showing all sock records that have the style knee-high.
One more example
The example explained here (flask_db_read) provides two very different queries on the sockmarket database — which is a SQLite database.
A separate example (see a live version) provides two other very different queries. The code for that example (flask_db_select) is here. The sockmarket database used in that example is a MySQL database.
Summary
Reading from the database depends on being able to connect to the database in the first place. That is covered in Flask and Databases.
After that is accomplished, you need to write a database query (in a Flask route function) that gets what you need from the database. You might need only one record (part or whole), several records, or just values from one column in the database.
Before writing any queries, though, you need to create a model for each table in your database. The name of this model class will be used in your database queries.
If your database has more than one table, you might need to write SQL joins to get what you need. Joins are not covered here. Explicit linking of tables with a foreign key also is not covered here.
Values obtained from a database query are then passed to a Flask template. Using the Jinja template syntax in the template file’s code determines where the values appear in the HTML. That is covered in Flask Templates and also in this chapter.
.